
All Brand Guides
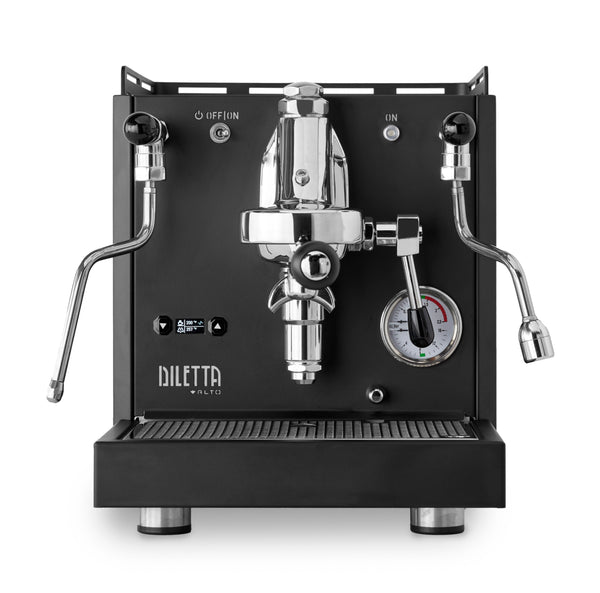
Diletta Alto Espresso Machine
View Product PageDownload Diletta Alto User Manual (PDF)
Reach new espresso heights with the Diletta Alto Espresso Machine. Diletta's first dual boiler, the Alto features PID-controlled brew and steam boilers for best in class temperature management. Only an inch wider than the original Diletta Bello, the Alto still manages to fit a 0.75L brew boiler and a 1.6L steam boiler in its counter-friendly case. Inside, all the user-friendly features found in the Bello+ make an appearance, including favorites like on-the-fly temperature controls, automatic shot timing, programmable preinfusion, and low power eco-mode. Experienced baristas will also love the Alto's upgrade to sprung valves with tap-to steam controls, and a top-accessible OPV valve for brew pressure adjustment. For those looking for even more espresso control, the Alto can also be had in an upgraded Flow Control version.
Manuals & Documentation
Setup & First Use
Tutorials & Training
Cleaning & Maintenance
Troubleshooting
Videos
Crew Review: Diletta Alto DUAL BOILER Espresso Machine - Full Review, Brewing, and Tasting!
The Diletta Alto Espresso Machine with (optional upgrade) Flow Control puts espresso creation at your fingertips. An upgraded version of the standard Diletta Alto, this version adds manual flow controls to the PID-equipped dual boiler formula. Only an inch wider than the original Diletta Bello, the Alto still manages to fit a 0.75L brew boiler and a 1.6L steam boiler in its counter-friendly case. Inside, all the user-friendly features found in the Bello+ make an appearance, including favorites like on-the-fly temperature controls, automatic shot timing, programmable preinfusion, and low power eco-mode. Experienced baristas will also love the Alto's upgrade to sprung valves with tap-to steam controls, and a top-accessible OPV valve for brew pressure adjustment. The addition of flow controls and a group pressure gauge lets you manipulate the extraction profile of your shots in real time, and opens up brew techniques otherwise impossible on a regular home machine.