
All Brand Guides + −
Acaia Pearl Coffee Scale
View Product Page|Acaia Pearl AP007 AP008 AP009 User Manual
Refresh your coffee experience with the new Acaia Pearl Coffee Scale. A measured improvement over previous versions; the new Pearl takes all the features that made the original so popular—minimalist design, connected functionality, and precision 0.1g accuracy—and improves on usability features you'll feel the weight of every day. Improved battery life, faster USB-C charging, a higher-contrast screen, and new flow rate and battery indicators tare the effort out of everyday coffee measuring. The Acaia Pearl Coffee Scale: Where high technology and craft coffee find balance.
Setup & First Use
Before using the Acaia Pearl for the first time, place it on a stable, vibration-free, and level surface. Avoid locations near heat sources, strong drafts, or other equipment that could affect readings. The Pearl is intended for indoor use only and operates between 15°C and 40°C.
Know Your Pearl
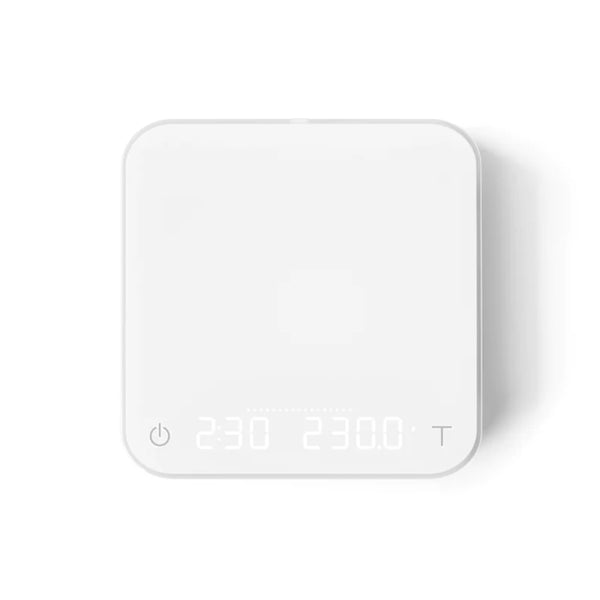
- Weighing Pan: The flat weighing surface. Always place items in the center for the most accurate readings. Never place hot objects directly on the pan — always use the included heat-resistant pad under any brewing vessel or portafilter.
- LED Display: Shows weight, timer, and mode information.
- Flow-Rate Indicator: An LED bar along the top of the display. Visualizes pouring speed in real time from 0.5 g/s (center) to 9.5 g/s (ends). Two pairs of brighter LEDs mark thresholds at 2.5 g/s and 6.5 g/s as reference points for pour over flow rate.
- Power Button: Press and hold to turn on; double tap to turn off. Also controls timer start/stop/reset during use.
- Tare Button (T): Tap to tare/zero; press and hold to toggle between grams and ounces; double tap to reset the current mode.
Charging the Battery
Charge the Pearl using the included USB-C cable connected to a computer, USB wall charger, USB-C PD charger, or DC car charger with an output of 5V and 1A. A full charge from empty takes approximately 1–2 hours. A fully charged battery provides 30–40 hours of use. Do not use fast-charging adapters — charging blocks that deliver over 5V at 1A can damage the scale's circuit board. The Pearl has built-in charging protection that will pause charging if the scale surface is hot from brewing; this is normal and charging will resume once it cools. The Charging/Low Battery indicator on the display lights when charging and turns off when full; it flashes when battery is low.
Checking Battery Level
With the scale off, press and hold the Power button until the battery percentage appears on the display. Battery level can also be checked at any time through the Acaia app.
Powering On
Press and hold the Power button. The display will show [ACAIA] and then transition to the operating screen. The scale starts in whatever mode was last used.
Basic Weighing
With the scale on in Weighing Only Mode, place your item in the center of the weighing pan. The display will show the weight in grams (0.1g readability). Tap the Tare button at any time to zero the display. Press and hold the Tare button to switch between grams and ounces.
Tutorials & Training
Understanding the Five Modes
The Pearl has five brewing modes, selectable by pressing and holding the Power button. Modes can be enabled or disabled individually in the Settings menu. The scale remembers the last active mode.
- Mode 1 — Weighing Only: Displays weight in grams or ounces with no timer. Best for simple dose measurement and general weighing. The Flow-Rate Indicator is not active in this mode.
- Mode 2 — Dual Display: Shows a timer on the left and weight on the right simultaneously. Timer runs from 0:00 to 9:59. The Flow-Rate Indicator is active in this mode. Tap Power to start, stop, or reset the timer.
- Mode 3 — Pour Over Auto-Start Timer: The scale automatically detects the start of water flow and starts the timer. The timer stops when the brewing vessel is removed from the scale. When the vessel is removed, the display flashes the final beverage weight. The Flow-Rate Indicator is active in this mode. Best for pour over where hands-free timing is preferred.
- Mode 4 — Portafilter Mode: Designed for weighing espresso doses directly in a portafilter. The scale auto-detects when a portafilter is placed and tares its weight automatically. Remove the portafilter to add grounds, then place it back to weigh the dose. After the portafilter is removed for 15 seconds (default), the mode resets for the next workflow.
- Mode 5 — Beverage Mode: A guided pour over workflow that tracks the coffee-to-beverage ratio. The display steps you through placing the carafe/cup, filter/dripper, and coffee beans (press and hold Tare between each step to confirm). The timer starts automatically when water flow is detected and stops when the dripper is removed. At the end, the display shows total brew time, total water added, beverage weight, and the coffee-to-beverage ratio.
Pour Over Workflow (Mode 3)
Place your brewing vessel with filter and grounds on the scale. Tap Tare to zero if needed. Begin pouring — the timer starts automatically when the scale detects water flow from your kettle. The Flow-Rate Indicator will visualize your pouring speed in real time. The timer stops when you lift the dripper off the scale, and the final beverage weight is displayed. The mode will auto-reset after 20 seconds by default (configurable in Settings under Auto.rES).
Espresso Workflow (Mode 2)
Place your portafilter or cup on the scale and tap Tare to zero. Begin your extraction and tap Power to start the timer. Monitor weight and time on the dual display simultaneously. Tap Power to stop the timer when your target yield is reached. Double tap Tare to reset weight and timer for the next shot.
Connecting to the Acaia App
The Pearl connects via Bluetooth 4.0 to the free Acaia app (iOS and Android). The app provides access to brewing guides, battery percentage, firmware updates, and advanced configuration. Bluetooth can be enabled or disabled in Settings under [bt_SEt].
Calibration
Turn the scale on and ensure it is in Weighing Only Mode showing grams. Tap the Tare button rapidly and repeatedly until [CAL] appears on the display. Place a calibration weight of 100g, 500g, or 1000g on the center of the weighing pan and wait for [_End_] — calibration is complete. Always calibrate on a stable, vibration-free surface free of drafts; Error 304 will appear if environmental noise is too strong.
Cleaning & Maintenance
Exterior Cleaning
Use a soft cloth dampened with warm water only to wipe down the scale body and weighing pan. Do not use detergent, alcohol, solvents, or any other chemicals — these can damage the scale's finish and internal components. Do not submerge or soak any part of the scale.
Heat-Resistant Pad
Always place the included heat-resistant pad under any hot brewing vessel, portafilter, or kettle set on the scale. Placing hot objects directly on the weighing pan can cause damage to the internal components.
Battery Care
Charge with the included USB-C cable using a 5V/1A power source only. Avoid fast chargers. No wall adapter is included — use a computer USB port or a standard 5V/1A USB adapter. Charge as needed before the battery fully depletes, but avoid charging more than necessary for long-term battery health. The Pearl's built-in charging protection will pause charging if the scale is warm from use; this is normal.
General Storage
Store the scale in a dry indoor location away from heat sources and direct sunlight. Do not stack heavy objects on top of the weighing pan, and protect the scale from drops and impacts, as these can damage the load cell.
Troubleshooting
Scale Won't Turn On
Check the battery — connect the USB-C cable to a 5V/1A power source and allow at least 30 minutes of charge before trying again. The Charging/Low Battery indicator will light when charging begins. If the scale is warm from recent use, the charging protection may have paused charging; allow it to cool and try again. If the scale still does not respond, test the USB-C cable with another device to rule out a cable issue.
Inaccurate or Drifting Readings
Ensure the scale is on a stable, vibration-free, level surface away from drafts and heat. Place items in the center of the weighing pan. If readings seem off after these checks, run a calibration using a known weight (100g, 500g, or 1000g). Zero Tracking (trAcE) is recommended to stay at its default 2d setting to compensate for minor zero-point fluctuations as room temperature changes.
Timer Not Starting Automatically (Mode 3)
The auto-start timer triggers on detected water flow, so the scale needs to be on a stable surface without competing vibrations. Ensure you are actually in Mode 3 (Pour Over Auto-Start) and not Mode 2 (Dual Display, which requires a manual tap to start the timer). Tap Tare to zero the weight before pouring if needed.
Portafilter Not Being Detected (Mode 4)
Confirm Mode 4 is enabled in Settings under [NodE_4]. Place the portafilter squarely in the center of the weighing pan and wait a moment for the auto-tare to register. If the auto-reset is not occurring between doses, check the [Port.rES] setting — the default is 15 seconds after portafilter removal.
Error Codes
- Error 100: Access code error. Contact Acaia support.
- Error 101: EEPROM memory error. Contact Acaia support.
- Error 102: Weighing signal error. Contact Acaia support.
- Error 303: Unable to find acceptable zero point — likely due to load cell damage from a drop or excessive force. Contact Acaia support.
- Error 304: Calibration error — too much environmental vibration or noise. Move to a more stable location and try again.
- Error 802: Unable to tare — weight exceeds acceptable tare range. Remove excess weight and try again.
- Error 803: Unable to tare — weight is unstable. Allow the reading to settle before taring.
- Error 900: Passcode error (default passcode is 0000).
- Overload: Weight exceeds the 2000g maximum capacity. Remove weight immediately.
- Underload: Weight is below minimum detectable capacity.
Scale Not Connecting to App
Confirm Bluetooth is enabled in Settings under [bt_SEt]. Ensure the Acaia app has Bluetooth permissions on your phone and that no other device is already connected to the scale. Restart both the scale and your phone and attempt pairing again.
Still Need Help?
Contact Acaia support directly at support@acaia.co.
About Acaia Corp
About Acaia Corp
Brand warranty information
What it Covers: Acaia Pearl and Pearl Model S Scale
Length: 1 year from purchase date (customer is responsible for freight charges when sending in the defective scale and receiving the replacement.)
Who Supports the Warranty: Acaia, warranty covers manufacturer defects within 1 year of the purchase date.
Warranty Contact Information: Email at support@acaia.co