← Back to Brand Guides
Hario Skerton Plus Hand Grinder

Hario Skerton Plus Hand Grinder

A light refresh to an old classic, the Hario Skerton Plus aims to improve on the time-tested grind of the original design. While the plus maintains the original Skerton's iconic shape and ergonomics, the addition of a stabilizing plate helps keep the grind consistent at coarser settings. You'll still get the same sharp ceramic burrs and ball jar compatible threading—just with better performance for French press and pour over brew methods.

What's In The Box
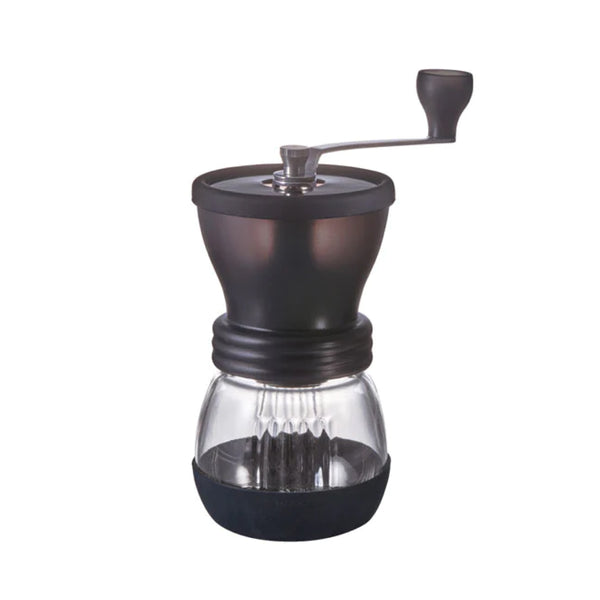
Hario Skerton Plus grinder body, Glass receptacle with lid, Crank handle, Grind adjustment nut, Stabilizer plate, Non-slip rubber base

Setup & First Use

The Hario Skerton Plus is a manual hand grinder with ceramic conical burrs. No electricity is required. Before first use, rinse the glass receptacle and wipe the burr assembly with a dry cloth to remove any residue from manufacturing.

Assembly

Attach the non-slip rubber base to the bottom of the glass receptacle. Thread the grinder body onto the glass receptacle. Insert the stabilizer plate onto the burr shaft — this keeps the lower burr steady during grinding and improves consistency. Thread the grind adjustment nut onto the shaft from the bottom to set your grind size, then place the crank handle on top of the shaft and secure it with the locking screw.

Setting Grind Size

To adjust grind size, loosen and remove the locking screw and lift off the crank handle. Turn the grind adjustment nut clockwise to make the grind finer, or counter-clockwise to make it coarser. Do not turn the nut so far clockwise that the ceramic burrs contact each other — this can damage them. Replace the handle and locking screw after adjusting. As a general starting point, coarser settings suit French press and cold brew; medium settings work well for pour over and drip; finer settings are needed for AeroPress and moka pot.

Loading and Grinding

Remove the lid and add whole bean coffee to the hopper — up to 100g maximum. Replace the lid. Hold the grinder body firmly with one hand (the figure-eight shape makes this comfortable) and turn the crank handle clockwise with the other. Grind until the receptacle contains your full dose. Do not spin the handle freely or reverse direction during grinding, as this can damage the burrs.

Tutorials & Training

Dialing In Grind Size

The Skerton Plus uses a stepped adjustment nut — each click of the nut moves the burrs a fixed increment. Start with a few clicks from fully closed (finer end) for espresso-adjacent methods, or several clicks out for coarser filter methods. Because adjustment requires removing the handle each time, it helps to establish a reference point: count the number of clicks from fully closed and note which count works best for each brew method you use regularly.

Grinding Tips

Grinding speed and pressure have some effect on grind consistency — a steady, moderate pace produces the most even results. Short, fast cranking can introduce more fine particles. For best results, grind at an even tempo and keep the grinder on a stable surface with the rubber base in contact. The stabilizer plate on the Skerton Plus significantly improves lower-burr stability compared to earlier versions, which helps produce a more uniform grind across all settings.

Brew Method Reference

  • French press / Cold brew: Coarse — several clicks out from center
  • Pour over / Drip: Medium — middle range
  • AeroPress / Moka pot: Medium-fine
  • Espresso: Fine — the Skerton Plus can reach espresso-range settings but results will vary depending on your machine

Cleaning & Maintenance

After Each Use

Empty the glass receptacle and wipe it out with a dry cloth or soft brush to remove loose grounds. The glass receptacle can be washed with a neutral dish soap and a soft sponge — do not use abrasive scrubbers, steel wool, or sponges with abrasive compound, as these can scratch the glass. The glass receptacle is also dishwasher safe.

Burr Cleaning

Disassemble the grinder by removing the locking screw, handle, and grind adjustment nut. Lift the upper burr assembly off the shaft. Brush the ceramic burrs and the inside of the grinder body with a dry brush to remove packed grounds and oils. Do not use water directly on the burr assembly unless you intend to dry all parts completely before reassembly — moisture left on the metal shaft components can cause corrosion over time. Do not use oil for cleaning any part of the grinder.

Ceramic Burr Care

The ceramic burrs are durable and do not rust, but they can chip if dropped or struck against a hard surface. Handle the burr assembly carefully when disassembled. Do not turn the grind adjustment nut so far clockwise that the burrs make contact with each other — ceramic-on-ceramic contact without beans present can cause chipping.

Troubleshooting

Handle Spinning Freely Without Grinding

This usually means the grind adjustment nut has worked loose or the burrs are set too far apart. Remove the handle, check that the adjustment nut is snug and set to an appropriate position, and reassemble. Also check that no split beans or debris are lodged in the hopper or burr gap — small fragments can prevent beans from feeding into the burrs properly.

Grind Is Inconsistent or Contains Large Particles

Confirm the stabilizer plate is installed on the burr shaft before reassembling — without it, the lower burr can flex during grinding, producing uneven particle sizes. Also check that the grind adjustment nut is fully tightened after setting your grind size.

Grind Adjustment Nut Will Not Turn

If the nut feels stuck, do not force it. The burrs may be in contact — turn the nut slightly counter-clockwise to open the gap before attempting to adjust further. Never force the nut clockwise past the point of resistance.

Glass Receptacle Is Loose

Ensure the grinder body is fully threaded onto the glass receptacle and the rubber base is seated properly. The rubber base helps stabilize the receptacle during grinding — grind on a flat surface with the base making full contact.

About Hario

Hario

About Hario

Founded in 1921 in Japan as a manufacturer of heatproof glass, Hario is synonymous with innovative, high-quality coffee and tea equipment. You’re probably familiar with the iconic Hario coffee dripper—the Hario V60—but this cutting-edge company also produces a suite of portable hand grinders, coffee presses, servers, decanters, drip pots and other great accessories. Explore our selection at Seattle Coffee Gear for our favorite handpicked Hario products.
Brand warranty information

N/A

Back To Hario Guides Shop Hario