
All Brand Guides + −
Breville Luxe Brewer Glass Coffee Maker
View Product Page|Breville_Luxe_Brewer_User_Manual.pdf
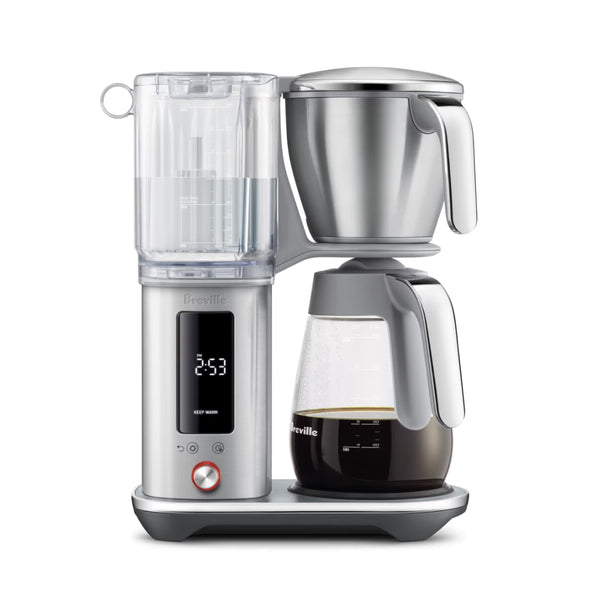
Make the most of your pot of coffee with the Breville Luxe Brewer Glass Coffee Maker. An informed upgrade over the Breville Precision Brewer, the Luxe Brewer brings even more functionality to its form. Built to brew to Gold Cup standards, the Luxe brewer rapidly hits the target 198º to 204º water temperatures for perfect extraction, and can brew a full 60-ounce carafe of coffee in under 8 minutes. In addition to rock-solid batch brewing, the Luxe Brewer also packs in functionality for cold brew, allowing up to 24 hours of steeping time before extracting. New to the Breville brewer lineup, the Luxe Brewer adds a removable water tank alongside replaceable water filtration for faster, cleaner water. Other upgrades include a large, high-contrast display and upgraded chrome touchpoints. This model comes equipped with a glass coffee carafe and a hot plate with an adjustable timer. For the thermal carafe version, see here.
Setup & First Use
Before using your Breville Luxe Brewer Glass for the first time, remove and discard all packaging materials and labels. Remove all parts and accessories from the box before discarding the packaging. Wipe the exterior stainless steel housing with a soft cloth. Wash the lid, brew basket, cone filter basket insert, mesh basket filter, and carafe in warm, soapy water — avoid abrasive cleaners or pads. Rinse and dry thoroughly. Press the carafe drip stop firmly to confirm it moves up and down freely before first use.
Installing the Water Filter
Remove the water filter and adapter from their packaging. Insert the filter into the water filter adapter, then press the assembled unit down into the water tank until it locks into place.
Setting Water Hardness and Flushing
- Insert the empty brew basket and the empty carafe (with the carafe lid locked on) into the machine.
- Fill the water tank with fresh cold water up to the Carafe Max line. Plug the machine into the power outlet.
- On first power-on, the display will show SET HARDNESS. Dip the included water hardness test strip into a cup of the same water for 1 second, then wait 1 minute to read the result. Rotate the SELECT dial to match the number of bars shown on the strip, then press the dial. The machine will beep to confirm. If the strip shows 4 or 5 bars, switch to a different water source — filtered water is recommended.
- The display will show 2:00 min. Press the dial once and the machine will immediately run a flush cycle, dispensing all the water through the system and into the empty carafe. The machine beeps once when complete. Empty the basket and carafe before proceeding.
Setting the Clock and Temperature Units
After the flush cycle, the machine beeps three times and the LCD displays the time setting. The hour will blink first — rotate the SELECT dial to set the hour and press to save, then repeat for minutes. The machine will then prompt for temperature units (°F or °C) — rotate to select and press to save. The machine beeps once and displays the brew mode menu, indicating it is ready to brew.
Tutorials & Training
Choosing the Right Filter and Basket
The Luxe Brewer Glass includes two filter options that affect both flavor and clarity. For 2–8 cups, use the cone filter basket insert with a cone-shaped paper filter (not included) — cone filters emphasize brighter, fruitier flavor notes. For more than 8 cups, use the mesh basket filter or the flat bottom brew basket with a large paper filter — flat bottom filters bring out more floral, nutty, and chocolate notes. Never use both the mesh basket filter and a paper filter at the same time. Paper filters produce superior clarity; the mesh basket filter allows some fine sediment into the cup, which is normal.
Coffee and Water Ratio
Breville recommends 1 level Breville measuring scoop (approximately 8.25g) of ground coffee per 150ml of water. For a full 1.8L carafe, use 12 level scoops (approximately 99g). Adjust to taste, but do not exceed 12 scoops — overfilling can cause the basket to overflow. Use a medium-to-coarse drip grind. Never use espresso grind — the fine particle size will clog the basket and over-extract the coffee.
Brewing Using the Carafe
Fill the water tank to the desired volume marking on the tank. Select the appropriate basket and filter for your brew volume. Add your ground coffee, insert the brew basket into the machine, lock the carafe lid, and place the carafe under the drip stop outlet. Rotate the SELECT dial to BREW and press once. The LCD will display brewing progress. When complete, the machine beeps once and switches automatically to KEEP WARM mode, maintaining the coffee at 175°F / 80°C for up to 6 hours. Always ensure the carafe is completely empty before starting a new brew — residual coffee will affect flavor and can cause overflow.
Single Serve Brewing (Under 4 Cups / 500–600ml)
For smaller volumes, the machine automatically adjusts its brew settings. Fill your cup with fresh cold water and pour it into the tank, keeping the water level below the Single Serve line. Place an empty cup or the carafe without its lid beneath the brew basket outlet. Use the cone filter basket insert for smaller volumes to ensure good contact between water and grounds. When brewing single serve, the LCD will display REMOVE CARAFE LID — this disengages the drip stop to allow full flavor extraction for a single cup. Allow approximately 4 minutes for the brew to complete. Note that on the BDC415, the heating plate does not activate for Single Serve brews unless manually activated afterward.
Cold Brew Mode
Cold brew uses cold water and a full immersion method, steeping the coffee and water together for an extended time — typically 4 to 14 hours. Breville recommends a brew ratio 2–3 times higher than regular brewing: approximately 3 scoops per 150ml of water. The maximum Cold Brew volume is 600ml (4 cups / 20 fl oz). Fill the tank to at or below the COLD BREW MAX line. Remove the cone insert and mesh basket filter, and use only a large paper filter. Insert the carafe without its lid — the lid must not be on the carafe during Cold Brew. Cold Brew steep time defaults to 24 hours but can be adjusted from 30 minutes up to 36 hours via the Settings menu. When the steep time is complete, the machine automatically dispenses the cold brew into the carafe. Do not add ice to the tank; use cold, chilled water only.
Using Custom Brew
The Custom brew setting lets you fine-tune four parameters for a personalized one-touch brew profile that the machine saves for next time. Access Custom via the Settings button and SELECT dial. The adjustable parameters are:
- Bloom Volume: The amount of water dispensed before the bloom pause begins.
- Bloom Time: How long the machine pauses after the initial water contact to allow CO₂ to release from the grounds. Recommended range is 30–60 seconds. If coffee tastes overly bitter, shorten bloom time; if it tastes sour, lengthen it slightly.
- Brew Temperature: The temperature of water delivered to the grounds. Adjustable for different bean types and roast levels.
- Flow Rate: Controls how quickly water is delivered to the grounds — Slow, Medium (default), or Fast. Slower flow increases contact time for a stronger, fuller extraction.
Delayed Auto Start
The machine can be programmed to begin brewing automatically at a preset time up to 24 hours in advance. Set up the machine with water, ground coffee, and the appropriate filter and basket, then press the DELAYED AUTO START button. Rotate the SELECT dial to set the desired start time and press to confirm. The machine will beep once to confirm. Then rotate the dial to select the brew mode. Note that the clock resets every time the machine is unplugged — the clock must be set before Delayed Auto Start can be used. Auto Start does not repeat automatically; it must be re-engaged for each use.
Coffee Quality Tips
For the best-tasting cup, Breville recommends using freshly roasted whole bean coffee with a peak flavor window of 5–20 days after the roast date. Always look for a "Roasted On" date on the bag. Grind directly before brewing using a burr grinder. Pre-grind coffee loses most of its flavor and aromatics quickly. Pre-heating the carafe with hot water for 30 seconds before brewing helps maintain optimal serving temperature. Fresh, good-tasting water makes a significant difference — if your water has an off taste or odor, use filtered water.
Cleaning & Maintenance
Important Safety Note
Always turn the machine off and unplug it from the power outlet before cleaning. Allow the machine to cool fully before handling hot components. Do not immerse the machine, power cord, or plug in water or any other liquid. Do not use alkaline cleaning agents, abrasive pads, steel wool, or harsh cleaners on any part of the machine — use only a soft cloth and mild detergent.
After Each Use
- Carafe: Empty the carafe after each use. Do not let brewed coffee sit overnight as it can stain the glass. Rinse the carafe and carafe lid under warm running water. For a deeper clean, wash in warm soapy water with a soft-bristled brush. Do not use abrasive cleaners. Rinse and dry thoroughly.
- Brew basket and mesh basket filter: Remove the basket, discard used grounds and filter paper, and rinse under running water. Ensure the fine holes of the mesh basket filter are clear of debris. For a deeper clean, wash in warm soapy water with a soft-bristled brush. Note that the basket may still be very hot immediately after brewing — allow it to cool before handling.
- Exterior housing and LCD: Wipe with a soft, damp cloth. Apply any cleaner to the cloth first, not directly to the LCD surface. Polish with a soft, dry cloth. Do not use abrasive materials that can scratch the surface.
Showerhead Cleaning
Periodically wipe down the showerhead area with a damp cloth. For a more thorough clean, remove the showerhead by unlocking the showerhead ring — rotate it clockwise then remove the showerhead. Clean it, then reinstall. Ensure the showerhead ring and showerhead are properly hand-tightened after reinstalling to prevent the showerhead from falling out during brewing.
Water Filter Replacement
The water filter replacement interval depends on your water hardness setting. For hardness level 1 (the softest setting), Breville recommends replacing the filter after 160 brew cycles. Higher water hardness levels require more frequent replacement. The machine will alert you via the filter icon in the Settings menu when a replacement is due. To replace, remove the old filter from the adapter in the tank, soak the new filter in cold water for 5 minutes, rinse it, insert it into the adapter, and press it down to lock into the tank. Using filtered water and replacing the filter on schedule prolongs descaling intervals and improves coffee taste.
Factory Reset
To reset the machine to factory settings (including water hardness): press and hold the Settings button and the Delayed Auto Start button simultaneously for 3 seconds until SET HARDNESS appears on the LCD. Follow the water hardness setup process from there.
Troubleshooting
Coffee Is Too Strong or Too Weak
The recommended ratio is 1 level Breville scoop per 150ml of water. Adjust the amount of coffee or water to suit your taste, staying within the 12-scoop maximum. Grind size also affects strength — if coffee is too weak, try a slightly finer grind (without going to espresso grind); if too strong, try slightly coarser.
Coffee Leaking from the Basket When Removed
The basket drip-stop seal is likely obstructed by coffee grounds or residue. Check the seal for any blockage. To clear it, turn the basket upside down and press down while rinsing into the seal to flush out any trapped particles.
Coffee Overflowing from the Basket
Caution: if the basket has overflowed, remove it slowly and carefully as it may contain hot water. Overflow is most commonly caused by one of the following: the carafe is not inserted when brewing above the Single Serve volume; grind is too fine; too much coffee in the basket (over 12 scoops); no filter paper in the basket; or a paper filter was placed inside the mesh basket filter. Check all of these before the next brew. Never use both the mesh basket filter and a paper filter simultaneously.
LCD Displays "FILL"
The water tank is empty or does not contain enough water for the selected brew volume. Open the tank lid and fill with fresh cold water. If the tank is full but FILL is still displayed, check that the machine is not positioned in direct sunlight or under bright direct lighting — the tank sensor uses light prisms that can misread in bright conditions. Move the machine away from the light source. Also confirm the tank is pressed firmly onto the machine until an audible click is heard.
Brew Doesn't Start
Confirm there is water in the tank above the minimum mark. Each brew mode also has a specific water volume range — the machine will not begin if the water level falls outside the allowed range for that mode. For Cold Brew, water must not exceed 600ml or the mode will be unavailable. For carafe brewing, the carafe must be in place whenever water exceeds the Single Serve line, otherwise the basket will overflow.
Delayed Auto Start Not Working or Starting at Wrong Time
Delayed Auto Start does not repeat automatically — it must be re-engaged for each individual use. If the machine displays CLOCK when you press the Delayed Auto Start button, the clock has not been set. Set the current time via the Settings menu before using Auto Start. Note that the clock resets every time the machine is unplugged, so Auto Start will not function correctly if the machine loses power between setup and the scheduled start time.
Cold Brew Mode Is Unavailable
Cold Brew mode is disabled when the water level in the tank exceeds 600ml. Reduce the amount of water to at or below the COLD BREW MAX line to re-enable the mode.
Showerhead Falling Out
The showerhead may loosen if not inserted and tightened correctly. Remove it, wash the showerhead ring and seal, reinsert, and hand-tighten securely. An uneven coffee bed during brewing is also a sign the showerhead is not properly secured — check the attachment of the showerhead ring and clear any scale or blockage from the showerhead screen.
Carafe Drip Stop Stays Down
The drip stop is stuck. Pull it back up manually. Clean the drip stop and surrounding area for any trapped coffee grounds or staining. If the drip stop does not return to the up position on its own after cleaning, contact Seattle Coffee Gear or reach out to Breville directly at breville.com.
Machine Producing Excessive Steam or Running for Extended Periods with Only Steam Output
This is typically caused by scale buildup from hard water affecting brewing performance. If the DESCALE icon is flashing on the LCD, a descale cycle is needed. Run the descale cycle via the Settings menu. If the issue persists after descaling, contact Seattle Coffee Gear or Breville support at breville.com.
Machine Displays "TOO HOT"
The machine has been run too many times consecutively and internal components have overheated. Allow the machine to rest for at least 20 minutes before starting another cycle.
Machine Brewing Slowly or Not Using All the Water in the Tank
There is likely a blockage in the system. Empty the tank, inspect and clean the mesh filter at the bottom of the tank for any coffee, fiber, or debris buildup. Allow the machine to cool, then run a FAST brew cycle with 1L of water. If the issue persists, contact Seattle Coffee Gear or Breville support at breville.com.
Machine Unresponsive at Water Hardness Setting
After the display shows "02:00 min" during the initial water hardness setup, you must press the SELECT dial to continue. If the water tank is not filled, the machine will prompt FILL WATER. Once water is confirmed, the machine will proceed to the flush cycle automatically.
About Breville
About Breville
Brand warranty information
What it Covers: Breville espresso machines, grinders and blenders
Length: 2 Years (Covers Bambino Plus, Barista Pro, Barista Express Impress, Barista Touch, Barista Touch Impress, Dual Boiler, Dynamic Duo, Oracle, Oracle Touch, Oracle Jet, and Precision Brewers), 1 Year (Covers Bambino, Barista Express, Grind Control, Milk Cafe, and Smart Grinder Pro)
Who Supports the Warranty: Breville USA
Warranty Contact Information: 866-273-8455
Can SCG Repair? Yes (excluding Bambino models and grinders) Read more about our repair services.
Note: Please register your product with Breville for warranty support.